Extended micrometer
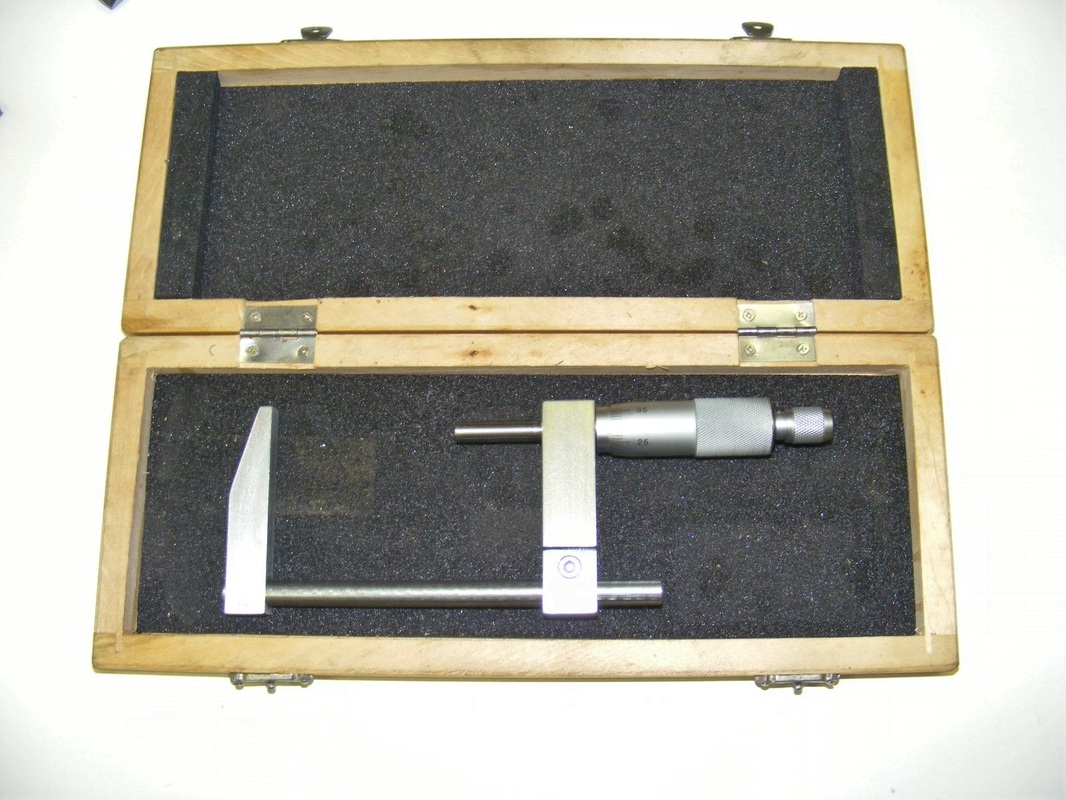
My most used measuring tools are a 150 mm digital caliper and a 0-25 mm micrometer. The caliper is used for most measurements and the micrometer is used where higher precision is required. Most times when using the micrometer it is to make a shaft or other piece exactly the same size as an already existing piece. It is rarely used for absolute measurements. I have no micrometer that will measure over 25 mm.
Mklotz showed an interesting idea for an adjustable micrometer that would permit relative measurments over a wide range of sizes, see:http://www.homemadetools.net/adjustable-micrometer. The micrometer shown here is very much based on his design.
Mklotz showed an interesting idea for an adjustable micrometer that would permit relative measurments over a wide range of sizes, see:http://www.homemadetools.net/adjustable-micrometer. The micrometer shown here is very much based on his design.
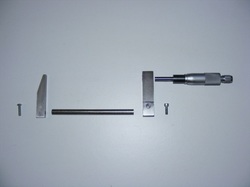
The components of the extended micrometer are shown here.
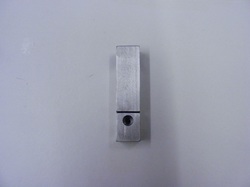
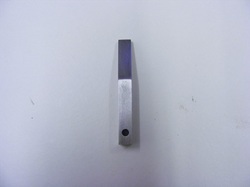
On the left is the micrometer head. This fits into a clamp bar.
The rod at the bottom also slides in the clamp bar and it can be locked at any point by tightening a clamp screw. An anvil piece is securely attached to the other end of the of the rod.
The two screws shown are the clamp screw and the screw that attaches the anvil piece to the rod.
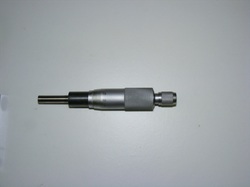
The micrometer head was purchased on ebay for a cost of circa £6 (about 10 USD). It has a range of 0-25 mm.
The part shown in black is 12.7 mm diameter.
The part shown in black is 12.7 mm diameter.
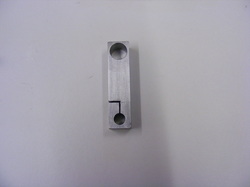
The clamp piece is made from 16 mm square bar 65 mm long. It is drilled out to 12.5 mm at one end in the mill, 8 mm from the end. It was then bored out to 12.7 mm using a boring head to give a good fit on the micrometer head above.
It is drilled out 8mm at the other end, 8 mm from the end of the bar, to accept the sliding rod.
Two slits were made using a junior hacksaw. The first was cut by passing the hacksaw blade through the 8 mm hole and sawing along the length of the bar for a distance of 8 mm. The other slit was made from the side of the bar as shown.
A 3.2 mm hole was drilled through the other face of the bar. This was enlarged to 4.5 mm until it reached the slit. The hole was then enlarged to 7mm for a distance of 4 mm. The 3.2 mm diameter section of the hole was then tapped M4.
Aftter cleaning all the slits an 8 mm round bar was passed through the 8 mm hole and a M4 socket head screw inserted
in the clamp screw hole. The screw was tightened down to check that the bar was securely clamped.
Aftter cleaning all the slits an 8 mm round bar was passed through the 8 mm hole and a M4 socket head screw inserted
in the clamp screw hole. The screw was tightened down to check that the bar was securely clamped.
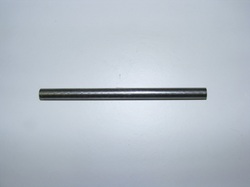
The sliding bar is simply a length of 8 mm round bar 120 mm long. Both ends were faced and one end was drilled and tapped M4
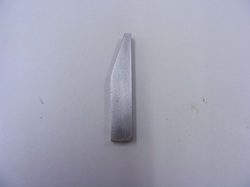
The anvil piece was cut from 8 x 12 mm steel bar. It was cut 65 mm long and one edge was cut at an angle as shown. The tip of the angle is 4 mm wide and the length of the angle is 25 mm. The angled cut was made on the bandsaw using the bandsaw clamp.
8 mm from the end of the bar the anvil piece was drilled out 4 mm.
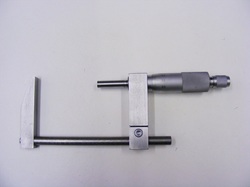
The assemble micrometer. The anvil piece is attached to the sliding rod using an M4 button head screw.
The clamp screw is used to secure the clamp bar to the sliding rod.
The micrometer head was secured in the clamp bar using Loctite high strength retainer.
The clamp screw is used to secure the clamp bar to the sliding rod.
The micrometer head was secured in the clamp bar using Loctite high strength retainer.
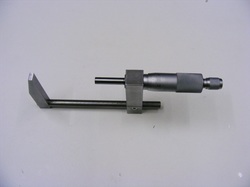
The micrometer can stand on a flat surface. This is convenient for some types of measurement.
The micrometer at the moment is only suitable for relative measurements. I intend to try and find some accurate 25, 50 and 75 mm standard blocks so that I can set the micrometer up for absolute measurements.
