Internal swing up toolholder Mk2
The initial testing of the original internal swing up toolholder was carried out on some scrap pieces of aluminium tube. In these tests it performed well and proved the concept of the internal swing up tool. However, more rigorous testing on harder materials such as steels showed some problems in the rigidity of the tool. Some of these problems were due to the use of grub screws to secure parts to the pivot rod which allowed some movement. A further problem was caused by the single screw holding the tool in position allowing additional movement. Another problem was the 6 mm pivot rod which also flexed slightly.
The net results of these problems was a significant movement of the tool and chatter during cutting causing poorly formed threads especially as the tool entered the work.
The use of a 6 mm pivot rod was dictated by the fact that I wanted to try to make an integrated combined tool for internal and external threading that would fit directly on my tool post. I have now given up that idea and have designed a much sturdier internal swing up toolholder that will clamp directly into a standard toolholder block. The new tool has a spring return mechanism rather than the weight used previously making it more compact. It performs well even in tough steel.
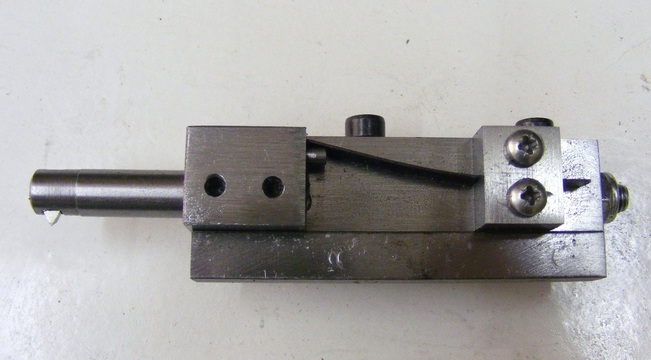
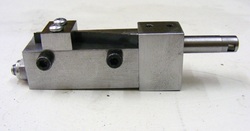
The header photo shows a top view of the tool. At the bottom of the photo is the bar that clamps into a standard toolholder block. Above and to the left is the swinging block that carries the tool. The tool is now secured with two screws. To the right of the swinging block is the spring and this is located in the block on the right hand side. The spring is not attached to the swinging block but merely presses against a small peg in the swinging block.
The net results of these problems was a significant movement of the tool and chatter during cutting causing poorly formed threads especially as the tool entered the work.
The use of a 6 mm pivot rod was dictated by the fact that I wanted to try to make an integrated combined tool for internal and external threading that would fit directly on my tool post. I have now given up that idea and have designed a much sturdier internal swing up toolholder that will clamp directly into a standard toolholder block. The new tool has a spring return mechanism rather than the weight used previously making it more compact. It performs well even in tough steel.
The header photo shows a top view of the tool. At the bottom of the photo is the bar that clamps into a standard toolholder block. Above and to the left is the swinging block that carries the tool. The tool is now secured with two screws. To the right of the swinging block is the spring and this is located in the block on the right hand side. The spring is not attached to the swinging block but merely presses against a small peg in the swinging block.
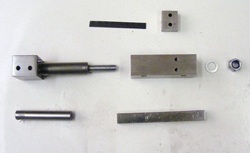
All the parts are shown in this photo. Looking at the centre row the swinging block and pivot shaft is on the left, the main block is next right and the washer and locknut that secure the swinging block into the block are on the right. Above is shown the spring and its retaining block. Below are the tool and the clamp bar.
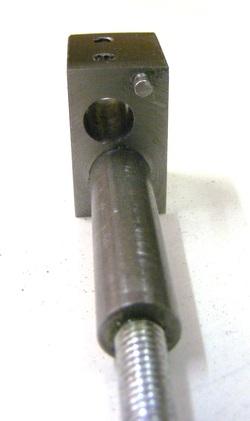
The swinging block was made from a 25 mm length of 16 x 19 mm bar. The holes for the pivot rod and tool were drilled and the 10 mm pivot rod attached to the swinging block using epoxy resin. This eliminates any possible slackness of this joint. The pivot rod is drilled and threaded to accept a length of 6 mm studding that was fixed in place using Loctite. The swinging block was faced both sides once the epoxy had set to ensure that both faces were accurately perpendicular to the pivot shaft.
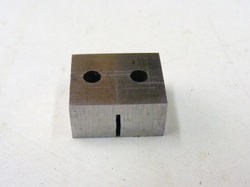
The two holes in the top of the block are for grub screws to hold the tool in the block.
The centre of the tool is 2 mm offset from the centre of the pivot rod.
Also note the 2.5 mm pin protruding from the block. The spring rests against this.
The two holes in the top of the block are for grub screws to hold the tool in the block.
The centre of the tool is 2 mm offset from the centre of the pivot rod.
Also note the 2.5 mm pin protruding from the block. The spring rests against this.
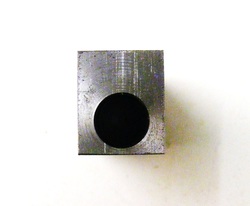
The block is a 50 mm length of 16 x 19 steel bar. A 10 mm hole was drilled and bored the whole length of the bar to give a sliding fit for the pivot rod. The bar was also faced off whilst it was in the lathe.
The spring retaining block is made from a scrap of 8 mm thick plate from the scrap box. This is slit with a junior hacksaw to a depth of 5 mm. The two 3 mm holes are for the screws that fix the retainer to the main block.
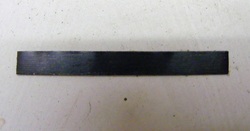
The spring is just a length of junior hacksaw blade (Eclipse) with the teeth ground off. It is 4.5 mm wide.
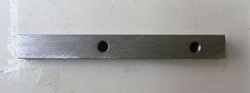
The clamp bar is a length of 8mm square bar. It runs the whole length of the toolholder and also acts as a stop for the swinging arm.
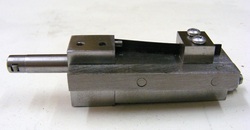
This shows the clamp bar side of the holder. Note the clamp bar acts as a stop for the swinging block. The spring just passes through the spring retainer and is not fixed to it in any way. The pressure of the spring keeps it in place.
Note the ends of the two screws securing the clamp bar in place.
Note the ends of the two screws securing the clamp bar in place.
The M4 screws securing the clamp bar pass right through the block.
The pivot rod passes through the body and it is secured in place with a thick washer and locknut. This is tightened fully and then slackened off a little until the swinging block moves freely.
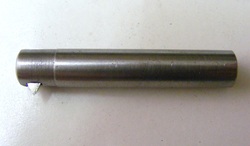
The tool is made from a 48 mm length of 8 mm diameter steel. A 3.2 mm hole was cross drilled at one end and then broached 1/8" square. In the lathe the shank was drilled out 3.3 mm until it broke into the broached cross hole. The end was tapped M4 for a distance of 10 mm. The cutter is a short length of 1/8" square HSS steel ground to a 60 degree point. This was pushed into the broached hole. A 3 mm round steel push rod was cut so that when inserted into the tool it was about 5 mm short of the end of the tool. A 5 mm grub screw then screws into the end to clamp the cutter in the broached hole.
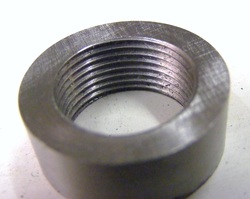
This shows a steel ring that has been threaded using the tool. The threads are clean even at the point where the tools enters the ring. There was no sign of any chatter during threading.
