Keats type angle plate.
Keats type angle plates are very useful for holding round workpieces perpendicular to a surface. They can be used both on the lathe faceplate and on the milling table. Commercial versions are, however, quite expensive. This simple Keats type angle plate was constructed from a piece of 50 x 50 x 6mm bright mild steel angle.
Construction requires accurate bending of the bright mild steel angle. In order to bend bright mild steel it is first necessary to anneal and stress relieve it.
Construction requires accurate bending of the bright mild steel angle. In order to bend bright mild steel it is first necessary to anneal and stress relieve it.
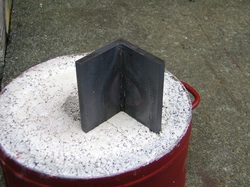
A piece of angle 75 mm long was heated to red heat and maintained at this temperature for aroud 15 minutes and allowed to cool slowly. I did this in my furnace.
The photo shows the piece after this treatment.
The photo shows the piece after this treatment.
In order to bend the angles accurately slots were cut using a 3 mm slot drill where the bends were required. The depth of the slots was 4.5 mm to leave 1.5 mm of steel to form the bends. With these slot dimensions the maximum bend that can be made is around 40 degrees before the two side of the slot close on one another.
In order to make the bend to greater angles a fine toothed hacksaw (mini hacksaw) is used to to cut material away in order to reopen the slot a little.
In order to make the bend to greater angles a fine toothed hacksaw (mini hacksaw) is used to to cut material away in order to reopen the slot a little.
This photo shows the steel angle after excess material has been cut away and the two wings have been folded back at an angle of 45 degrees.
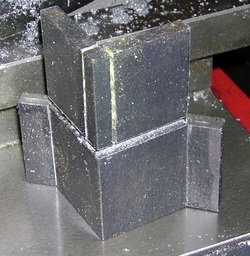
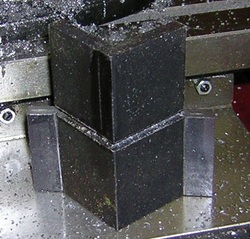
Here we can see that two saw cuts have been made in order to remove the corner of the angle.
Once the corner has been removed then the two upper pieces can be folded back 90 degrees to form the base of the Keats plate. Many saw cuts were needed after each bending operation to open up the slots in order to achieve the 90 degree bend.
Once the corner has been removed then the two upper pieces can be folded back 90 degrees to form the base of the Keats plate. Many saw cuts were needed after each bending operation to open up the slots in order to achieve the 90 degree bend.
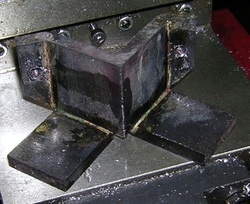
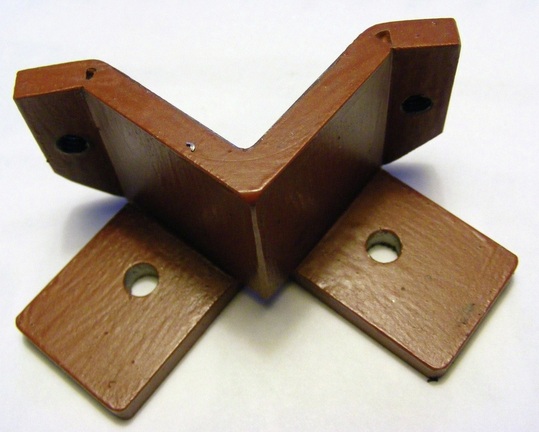
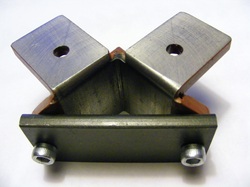
This shows the Keats plate after brazing the bends. Before brazing a length of steel filler wire was inserted into the cavity at the 45 degree bends. On the 90 degree bends there is almost no cavity and no filler wire is necessary.
Note that two 5 mm holes have been drilled in the 45 degree flanges. These are tapped M6 for the retainer plate screws.
After brazing the whole bracket was pickled in dilute hydrochloric acid to clean up the metal and remove the flux.
An alternative to brazing might have been to weld along the bends. I chose to braze for two reasons:
1. My welding abilities are not great and the result would not have been so tidy.
2. Welding would probably have introduced much more distortion.
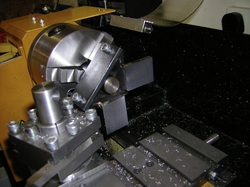
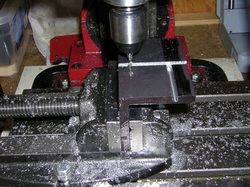
In order to ensure that the base was perpendicular to the angle vee a length of 19 mm round steel was chucked in the lathe and the Keats plate was bolted to the steel bar. The base was then faced off.
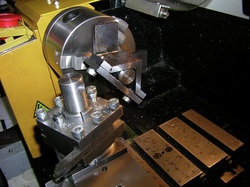
Once the base had been machined then the Keats plate was clamped to the bar the other way round and the top edge was machined.
The underside of the finished Keats plate. Two holes have been drilled in the base for mounting purposes and a coat of paint applied to the non machined surfaces.
