LED goose neck worklight

I had previously built a worklight similar to the one shown above that used an MR11 halogen light bulb. This was very good as a worklight but it had one disadvantage in that it became very hot in use. Sudden jolts when the back of the hand brushed against the back of the worklight are not a good idea when working close to fast turning machinery. In the end I replaced the halogen lamp with an MR 11 LED lamp that had 6 LEDS. The problem with this was that the light was not really bright enough and the colour of the light was a harsh white light. However, it did run very cool.
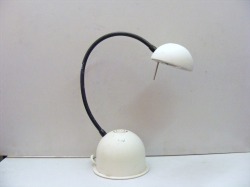
Sometime later my daughter was throwing out a desk lamp as shown here. This had a halogen lamp and a large transformer in the base. At the same time a search on e-bay showed that MR11 LED light bulbs had become available which had many more LEDS and a warmer light. I ordered one of these with 15 LEDS, rated at 3 watts, and constructed a new worklight based on the goose neck from the discarded desk lamp.
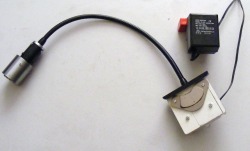
This shows the completed worklight. At the bottom right is a sheet metal bracket to which the goose neck is attached. Also mounted on the bracket is a powerful magnet recovered from an old hard drive.The magnet fixes the lamp to the back of the chip guard of the lathe. On the other side of the bracket is mounted a small connection box that conects the wires from the lamp to the power supply. The other end of the goose neck connects to the lampholder assembly. Also shown in the photo is the power supply. This is rated 12 volt 500 mA which is more than enough to supply the 3 Watt LED lamp.
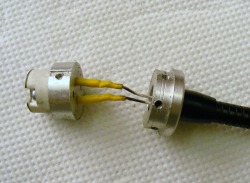
This photo shows the connections to the lamp holder. The ceramic MR11 lampholder is fixed to an aluminium disc with three M3 holes equally spaced around the circumference. The goose neck has a screw end that also fixes into an aluminium flanged insert. The connections were made with fine insulated wire that was soldered to the wires from the lamp holder. The connections were insulated with heat shrink tubing.
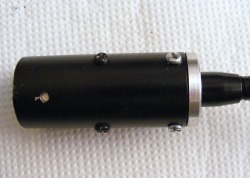
The parts shown in the previous photo slide into a 25 mm OD aluminium tube and are secured in place with M3 screws as shown here. Note also the M3 tapped holes at the front of the lamp holder. These are used for attaching the shroud that fits over and protects the lamp bulb.
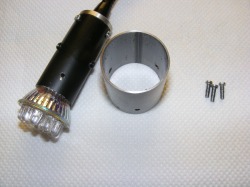
Here is shown the lampholder with the LED MR11 bulb inserted. Next to it is the shroud that fits over the bulb.The shroud is a piece of 35 mm ID ERW steel tube that is 40 mm long. The shroud is secured to the lampholder with the three M3 screws shown on the right.
LED lamps are ideal for use near machine tools for several reasons. Firstly, they work on safe low voltage power supplies. Secondly, there is no vacuum filled glass enclosure so even if they are struck there is no implosion and glass is not shattered in all directions. Thirdly, they are immune to vibration which greatly reduces the life of filament bulbs. Fourthly they have a very long working life (typically 20,000 hours +) and very low power consumption.
I am very pleased with the worklight. It is bright enough and is very easy to position where required by moving the goose neck and by sliding along the chip guard. The only disconcerting thing about the worklight was that it produced quite pronounced stroboscopic effects at certain speeds of the lathe. These effects can be quite useful for checking the calibration of the tachometer on the lathe but in general they are unwanted. The strobe effects can be eliminated by connecting a 470 uF capacitor across the power supply.
I am very pleased with the worklight. It is bright enough and is very easy to position where required by moving the goose neck and by sliding along the chip guard. The only disconcerting thing about the worklight was that it produced quite pronounced stroboscopic effects at certain speeds of the lathe. These effects can be quite useful for checking the calibration of the tachometer on the lathe but in general they are unwanted. The strobe effects can be eliminated by connecting a 470 uF capacitor across the power supply.
