Tangential toolholder
There have been many tangential toolholders described in magazines and on web sites. For a discussion of the purpose and merits of the design, see the section on tangential toolholders on this page: http://www.gadgetbuilder.com/ToolHolders.html
All the published designs seem to involve setting up compound angles for milling. My design requires only simple angles to be set up in order to produce it. The toolholder accepts 1/8" square HSS blanks. It is made from a single piece of 1/4" steel plate. The tool fits in a milled slot that is slightly less than 1/8" deep and it is clamped in place by an M4 screw.
All the published designs seem to involve setting up compound angles for milling. My design requires only simple angles to be set up in order to produce it. The toolholder accepts 1/8" square HSS blanks. It is made from a single piece of 1/4" steel plate. The tool fits in a milled slot that is slightly less than 1/8" deep and it is clamped in place by an M4 screw.
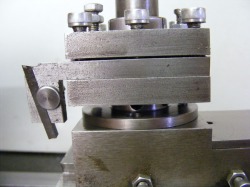
The tool slot is angled in the plane of the tool holder at 12 degrees so that the tool leans towards the centre-line of the lathe at 12 degrees from the vertical, as shown here.
What does not show in the first two photos is that the shank of the tool holder is not rectangular in cross section, but it is a parallelogram, with diagonally opposite corners of 102 degrees and 78 degrees.
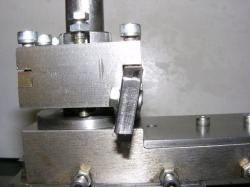
Here we can see an end view of the tool mounted on the toolpost. The "out of square" cross section of the tool holder shank makes the toolholder, and the tool clamped in it, lean towards the head stock by 12 degrees from the vertical
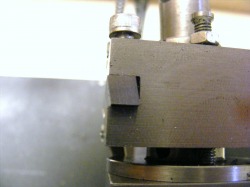
This is the other end of the tool which clearly shows the parallelogram cross section of the shank.
Thus, the angle of the tool slot shown in the first two photos, and the "out of square" cross section of the tool holder shank shown in the second two, combine to cant the tool not only 12 degrees towards the centre line, but also at 12 degrees towards the headstock.
Grinding the tool.
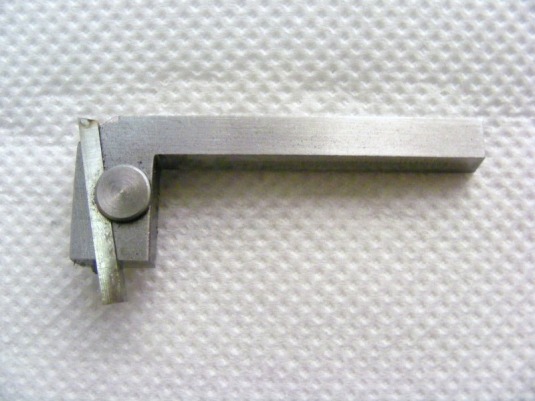
With a simple jig it is easy to sharpen tangential tools. The idea is to produce a slope running from one corner up to meet the diagonally opposite corner (the one that does the cutting) at an angle of 30 degrees. This is hard to describe in words, but will be understood by looking at this photo of the sharpening jig.

The surface with the triangular groove is angled at 30 degrees to the base of the unit. The tool is placed in this groove for grinding. The bar at the back is a guide that runs along the edge of the grinding rest and keeps the jig at right angles to the grind stone. In use the tool is placed in the triangular groove and held there with finger pressure. With the guide held against the grinding rest the tool is advanced until it touches the grind stone and then the whole jig is moved from side to side to form a diamond shaped cutting tip. Once the tool tip has been formed it is a very quick and simple job to re- sharpen the tool using the jig.
The advantage of this tool compared to normal tooling is that massive cuts are possible. It is easy to take a 1 mm cut into mild steel. It is also very good for machining up to shoulders. It is equally good for facing and turning work. Ease of sharpening is another benefit.
GadgetBuilder (see link above) and others report improved finish with tangential tooling. I have not noticed this. Maybe they slightly round the tip of the tool after grinding to take off the sharp point.
The tool can be used for light intermittent cuts. However, with heavy cuts the tool is slowly hammered down the retaining groove.
