Loose chuck jaws

Sometimes it is necessary to hold a screw in order to machine the tip to shape. This can be difficult with short screws because the jaws will only grip the head of the screw. This can be overcome sometimes by putting a nut on the screw or my making a split nut to grip the threaded part.
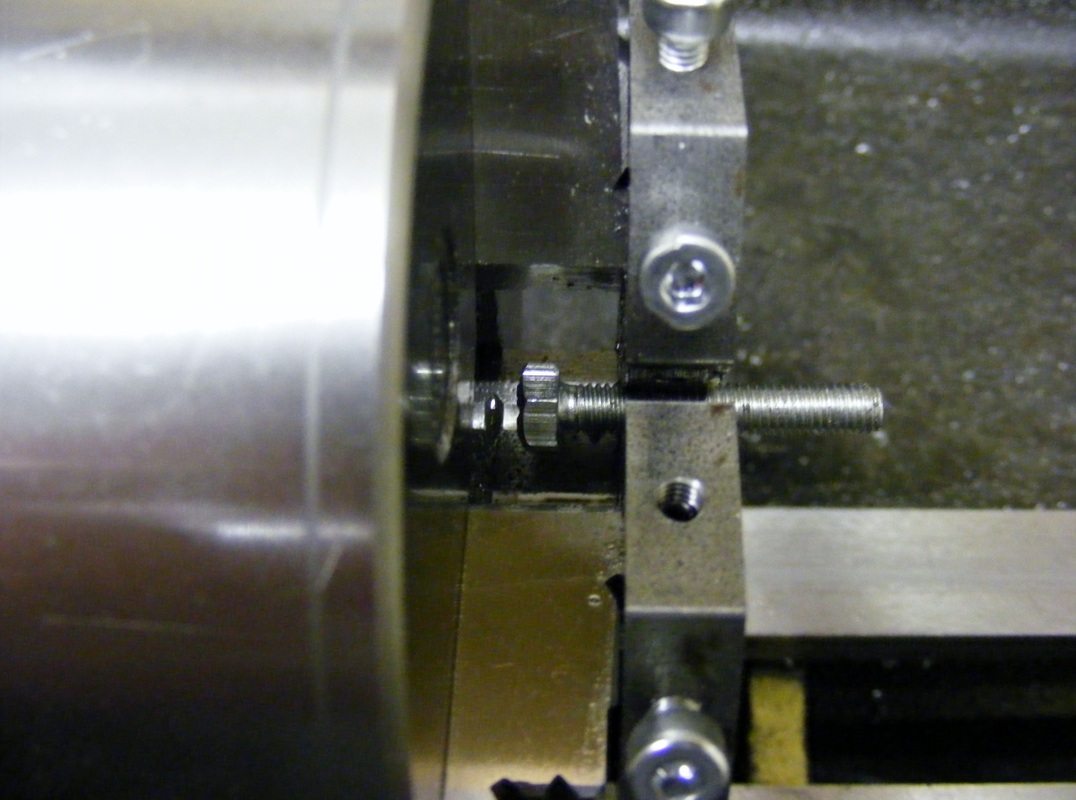
Recently on the Madmodder website Ieezitin showed a set of loose jaws (http://madmodder.net/index.php/topic,9489.msg105357.html#msg105357) that attach to the lathe chuck that enable screws to be held easily for machining the threaded part, as shown in the photo below:
Recently on the Madmodder website Ieezitin showed a set of loose jaws (http://madmodder.net/index.php/topic,9489.msg105357.html#msg105357) that attach to the lathe chuck that enable screws to be held easily for machining the threaded part, as shown in the photo below:
The Ieezitin version of these jaws were machined from round bar which was then milled to to a 60 degree point where the jaws meet. This means that the jaws can only be used at that one point. My jaws have been constructed from hexagon bar. This means that when one of the points of the hexagonal jaws becomes worn or damaged it can easily be turned around to a new point. Alternatively the other points on the hexagons can be drilled to accept other screw or bar sizes.
I made my jaws from mild steel. For delicate materials the jaws could be made from aluminium, brass or even plastic.
I made my jaws from mild steel. For delicate materials the jaws could be made from aluminium, brass or even plastic.
Each jaw is made from 32 mm (1.1/4") hexagon bar and is 8.5 mm thick.
A 30 mm length of the hex bar was mounted in the three jaw chuck. This was faced both ends. After centre drilling it was drilled out to 13 mm in stages. It was then bored out to a diameter of 17.3 mm. This diameter just fits over the ends of the three jaw chuck jaws.
On the bandsaw a slice 9 mm thick was taken from the end of the piece. The larger piece was re-chucked in the lathe and the cut end faced. This piece was then returned to the bandsaw and cut in half. This gives three pieces approximately 9 mm thick each having one machined face.
Each piece was taken and using the machined face as a reference a line is scribed 4 mm from the machined face on each of the hexagon faces. The midpoint of each line was then centre punched and then accurately drilled out 2 mm and then 3.3 mm. Each hole was then tapped M4.
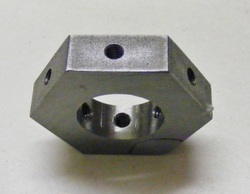
The photo shows the 6 tapped holes, one in each face.
The photo shows the 6 tapped holes, one in each face.
The three pieces were then assembled onto the lathe chuck with the machined face against the chuck jaw. The chuck was tightened loosely and each piece was tapped to bed it onto the machined face of the chuck jaw. Check that the points of the hexagon all meet. Three 6 mm M4 grub screws were screwed loosely into one of the holes at the side of the chuck jaw, for all three jaws. On the other side of each jaw a 12 mm M4 socket head cap screw was loosely tightened. These pair of screws in each jaw were then progressively tightened checking all the time that the points of the hexagon met in the middle and that the machined face was flat against each chuck jaw. The chuck was tightened firmly and two M4 cap screws were screwed into the two holes at the top of each jaw.
Once satisfied that everything lines up well then the rough sawn faces of the three loose jaws were then machined back to a final thickness of 8.5 mm. Without disturbing the assembly a centre drill was used to make an indent in the centre of the assembly and then this was drilled through 2 mm to create the centre hole.
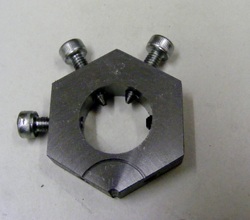
Using a sharp pointed tool a circle is deeply scribed in the front face of the loose jaws as shown in the header photo. This circle serves two purposes; it indicates the front face of the jaws and it ensures that the right hexagon points are toward the centre. When the tip of the jaws wears out each hexagon can be rotated to provide new points and a new circle of different diameter can be scribed.
Finally, each loose jaw was numbered to correspond with the numbering of the chuck jaws.
Once satisfied that everything lines up well then the rough sawn faces of the three loose jaws were then machined back to a final thickness of 8.5 mm. Without disturbing the assembly a centre drill was used to make an indent in the centre of the assembly and then this was drilled through 2 mm to create the centre hole.
Using a sharp pointed tool a circle is deeply scribed in the front face of the loose jaws as shown in the header photo. This circle serves two purposes; it indicates the front face of the jaws and it ensures that the right hexagon points are toward the centre. When the tip of the jaws wears out each hexagon can be rotated to provide new points and a new circle of different diameter can be scribed.
Finally, each loose jaw was numbered to correspond with the numbering of the chuck jaws.
The reason the holes are positioned 4 mm from the machined face of the hexagon is so that the holes line up with the first groove on the chuck jaw. This is 4 mm from the machined face on the chuck.
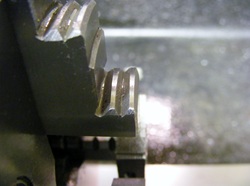
The new jaws can be used to machine a 60 degree point on the each of the screws that press against the groove top of the chuck jaw.. This provide greater security and ensure that the back face of the loose jaws are pressed hard against the chuck jaw.
The two screws that clamp the side of the chuck jaws should be left with flat tips.
I replaced all the 6 mm grub screws with with two 4 mm grubscrews. By using two in each hole they can be locked together so that the jaws can be easily taken off by loosening the capscrews and then replaced in exactly the same place. The side cap screw should be tightened before the top two capscrews when replacing the jaws.
If, and when, one point of the hexagon becomes damaged the centre hole can be drilled out to a new larger diameter that can be used to hold larger bar or screws. The jaws can then be rotated to a new position and a new small centre hole drilled for smaller objects.
