Making labels for machines and control panels.
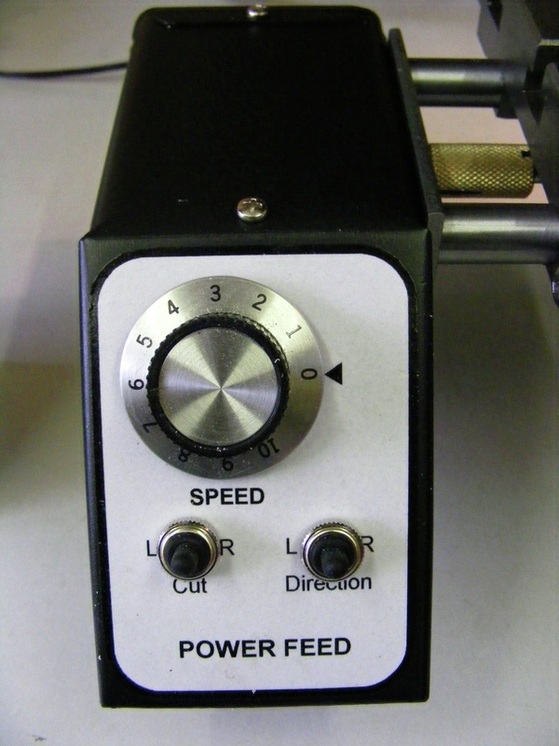
Some modifications to machines need labelling. This particularly applies to control panels like the one shown above. A neat, clear and well proportioned label greatly enhances the appearance and gives a professional look to a project.
I have tried many ways of labelling ranging from Dymo tape, Brother label printer, photo etching pcb board and inkjet printed labels on paper. Of these options, the injet printed labels look the best but my early attempts were not very durable.
My first attempts to produce injet labels were carried out on plain paper that was subsequently glued to the control panel using spray adhesive. These became messy and oil stained very quickly and the spray adhesive is softened rapidly once they are saturated in oil.
I then tried using self adhesive label paper and sprayed it, after cutting out the label, with acrylic lacquer. The adhesive on the label seems to stick well to most flat surfaces and the acrylic lacquer prevents oil penetration. These labels were much better and much more durable. The only problem with these is that when the paper is sprayed with acrylic lacquer it takes on a greyish, mottled appearance as shown below:
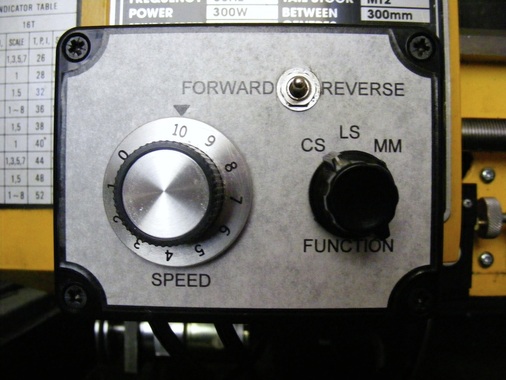
This effect seems to be caused by the porous paper surface absorbing the acrylic lacquer making it translucent so that the background colour of the control panel shows through. In the example above, the control box is black ABS plastic and the black shows through producing the greyish colour.
My next attempt was to try self adhesive photo quality paper. This is quite difficult to obtain in the usual High Street stationery outlets but there are several advertisers on ebay sellling this product. I paid 1.99 for a pack of 10 matt A4 sheets,110 gsm, from ebay. This has a very close non-porous surface and prints a very crisp, sharp image on an injet printer. When sprayed with acrylic varnish the paper does not become translucent and it remains white and un-mottled. A label produced in this way is shown in the header photograph. I have now adopted this paper for all my labels, and labels produced in this way have proved very satisfactory and durable in use.
My procedure for producing labels is as follows:
1. Take the front panel and lay it on a sheet of paper and with a sharp craft knife cut around the outside. Remove the cut out panel. Lay the sheet on a photocopier and place the front panel in the cut out. Take the removed piece of paper and lay this on top of the panel. Now make a copy. The copy should show an outline of the panel with all the holes showing white. This procedure enables measurement of the coordinates of all the holes.
2. Using a CAD program enter the shape of the panel and mark the hole positions. At the hole centres draw circles the same size as the hole diameters. Now lay out the required text and other markings on the drawing. Draw a border for the label using thick black lines about 5 mm in from the edge of the panel outline. Once satisfied with the layout then print the drawing onto plain copier paper. Lay the drawing onto the front panel to check that the shape is correct. Hold it up to the light and check the hole positions are correct. Finally place the knobs and switches etc on the drawing and check that the text for each is correctly positioned. If necessary correct the drawing. Once satisfied then print the drawing onto the self adhesive photo paper.
3. Cut out the label from the sheet carefully with scissors around the thick, black border.
4. At the edges of the label the white sheet shows so go round the edges with a black permanent felt tip marker. This eliminate the white showing through.
5. Spray the label with acrylic lacquer. I do this four times with the label in a vertical orientation. After each spraying I wait 30 mins and then turn the label through 90 degrees for the next coat. This ensures an even coating over the entire face and edges.
6. The label is then laid onto a flat surface (I find plas coated chipboard works well for a surface) and holes are cut in the label, where the circles are marked, using a wad punch.
7. Then peel off the backing paper and attach the label to the control panel.
