Rear toolpost

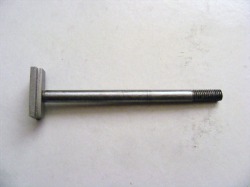
Having made the tee slotted cross slide adding a rear toolpost was an obvious next move. The rear toolpost is set up for parting and chamfering. The parting tool (1/16" x 5/16" x 4") is set at an angle of 5 degrees from the horizontal whilst the chamfering tool is horizontal. The protrusion of the tool can be adjusted but shims are then required to set the tip at centre height. The base is made from 1/4 x 1.1/2" steel and the pillar and toolholder are made from 1.1/2" square bar.
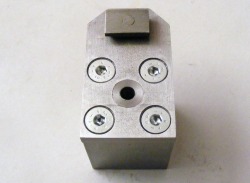
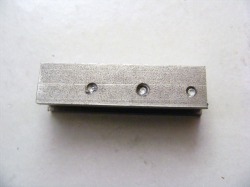
This shows the underside of the base. The base plate is held firmly in place by four M6 countersunk screws. Note that the pillar is shouldered and that the shoulder fits into a bored hole in the base. This eliminates any possibility of movement. At the top can be seen one of the tee bolts.
This shows the tee bolt that runs through the pillar.
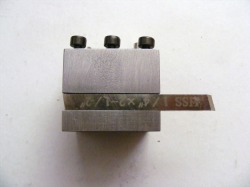
This shows the toolholder block viewed from the chamfering tool side. The tool is horizontal and the slot was cut so that the bottom of the tool is at centre height. The three screws clamp the tool in the slot. The chamfering tool has a 90 degree point so that it forms 45 degree chamfers.
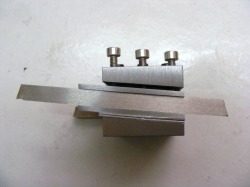
The tool holder as seen from the parting side. The slot is cut 16 mm wide, 12 mm deep and at an angle of 5 degrees. The tool is held in a small sub holder. The tool is shown with a 20 mm protrusion and there are two 0.9 mm shims under the sub holder to bring the tool tip to centre height. Removing one of these shims will allow a 10 mm protrusion with the tip at centre height. The tool is mostly used with a 10 mm protrusion.
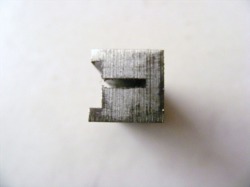
This shows the sub holder. This is machined from 12 mm square bar. The shallow slot is 2.2 mm deep at the bottom edge and it is milled at a slight angle to allow for the tapering sides of the parting tool. The deep slot in the centre is 10 mm deep from the top face of the holder leaving 2 mm of metal holding the top and bottom halves of the subholder together. The pressure of the clamping screws then squeezes the two halves together to grip the parting tool blade.
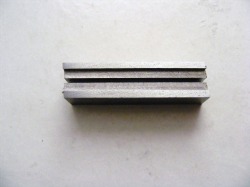
This photo shows the profile of the sub holder.
The top of the sub holder has three dimples formed with an M4 drill. These dimples are located directly below the clamping screws. The tips of the clamping screws have slightly conical ends to locate in the dimples.
My experience with this rear toolpost is that parting is much less of a problem than parting from the front toolpost. The spindle speed can be higher and the swarf just falls away rather than build up on top of the tool. it is also very convenient to use when making many parts all the same. The main turning tools can be in the front toolpost and the parting and chamfering in the rear toolpost and many times this is sufficient to complete a part without tool changes.
